Posts

Showing posts from April, 2019
Image
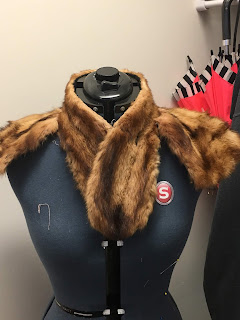
New Lining for an Old Fur Shrug **** Disclaimer**** I am against killing and trapping animals just for their fur I do believe in the philosophy of the Native Americans that  taught that when an animal is killed for food we honor its sacrifice by using all parts of it including the fur and bone. This  is a skin from an animal that died a hundred years ago, so there  should be no ill will towards those who wear vintage furs or furs  from  food animals that would have otherwise been thrown  out. (ex. rabbit) This beautiful fur piece was found on one of my recent Antiquing adventures with my dad. It as a mere $6 which  is a steal for anything vintage or fur. I think it is beaver but  hard to tell as it is not as course as most beaver that I have dealt with. It did need a bit of TLC but I love a challenge so  it was coming home to the dorm with me. The lining was completely gone with only the batting left I simply took a piece of shot s
Image
Butterick 6074 ★★★★☆ Skill: Intermediate Yardage: four yards of directional fabric  four yards lining.  Year : Regency pre-815 For this dress I decided to go with Butterick 6074 Dress view A. I have been rather obsessed with the regency era. It is almost a more satisfying era to sew as the dresses can be started and finished in a single day as opposed to a full 30-40 hours to complete an 1860's dress. I chose this pattern for the square neckline dress and the cute sleeve decoration. I actually followed the directions on this, my mom would be proud. The way it works is there is a fitted lining that is sewn to a gathered fashion fabric piece. While I read the instruction, I did not necessarily approve of how they did everything. The binding the pattern called for seemed unnecessary so I just didn't do it. The pattern also has too many open seams for my taste so I used a different technique for putting the lining and fashion fabric together.   Overall
Image
Tutorial For a Velvet Cuff Bracelet   Cost $30          Supplies:   13" length of 1" velvet ribbon $5 two box clasps $25 Step 1. measure your wrist and cut the ribbon that measurement minus the width of your clasp. I sewed the corners down on each side to create a v shape on each end to make it easier to mount to the clasp Step 2. Use a needle and thread to sew the ribbon and the clasp together, running the thread through the string holes on the clasp.  Step 3. Repeat with the other side. Cut your threads off and try it on.  May need a bit of tweaking to get it perfect for your measurements. Once you have one perfect, repeat with the other clasp and ribbon. These bracelets came in pairs, and were worn one on each side, and  it is very very rare to wear only one.